


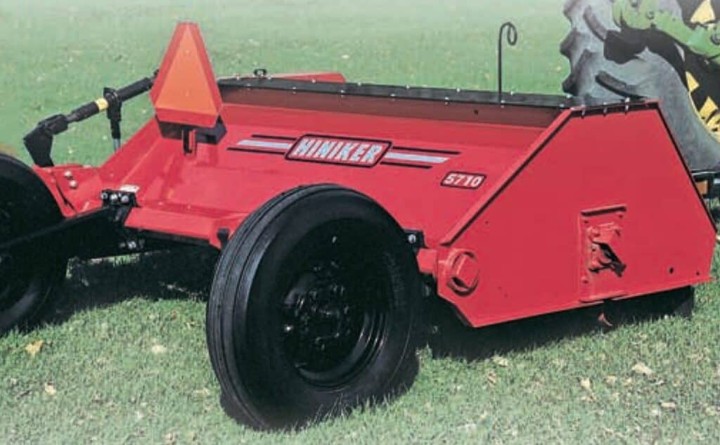
A practical guide for growers comparing field performance, setup, and ownership considerations.
Start with the material
Flail mowers are great at what they do. However, they can’t handle everything. The useful decision is about deciding whether a flail machine’s cut, containment, and residue handling fit the cleanup job. A useful starting point is this: roadside grass, corn stalks, cover crops, and woody volunteer growth place different loads on knives and driveline. In practice, the machine should be judged by what happens in the field, not by a single number in a brochure. The first things worth recording are stem diameter, moisture, density, stones, and hidden debris. Those observations give a dealer or operator something concrete to work from and make later adjustments easier to explain.
A common first move is to walk the area and separate routine vegetation from hazards the machine should not hit. This is also where high-capacity flail shredders belong in the comparison, because the label matters less than the result it can produce in the intended conditions. Watch for choosing from acreage alone; it often turns a promising demonstration into a poor ownership experience. The target is a machine matched to the toughest normal material. Write down the setting and the field condition together so the result can be repeated rather than remembered vaguely.
What flail mowers performance should prove in the field
This part of the decision becomes clearer when the operator stops treating field conditions as background noise. In this case, a flail rotor makes many small cuts inside a housing and can contain material differently than an open rotary deck. Check the desired finish, discharge pattern, terrain, and bystander exposure at more than one location. A short stop and a careful look usually reveal more than another round at full speed. For flail mowers, that habit is especially valuable because small setup errors can repeat across every row or acre.
Use the machine long enough to compare the actual cut and residue spread on a representative strip. The comparison may also include a flail shredder manufacturer. Ask what must change when the field is no longer ideal. The common trap is assuming every flail arrangement leaves the same finish. A better standard is cleanup suited to the site rather than a generic label. It keeps the conversation focused on crop, soil, material flow, and operator control instead of a feature list that may never matter on this farm.
.
.
Horsepower is only part of capacity
Conditions seldom stay uniform from one end of a field to the other. When dense or wet material can consume power while travel speed determines how much enters the housing, the operator needs a setting that is understandable and quick to verify. Use PTO speed, tractor power, cutting width, and how quickly rotor speed recovers as the scorecard. The flail mowers should respond predictably when the operator makes one deliberate change, and the finished work should show why that change helped.
A practical routine is to begin slowly at the recommended PTO speed and listen for sustained loading. Compare the role of flail shredders at the same moment, especially if it changes clearance, placement, or material flow. Avoid pushing speed until the cut becomes ragged. The better outcome is productive travel without repeated passes. Keep the test area small until the result is stable, then check again after the machine reaches normal operating temperature and speed.
Cutting height protects more than stubble
Operators often notice running too low can increase soil contact, thrown debris, knife wear, and scalping on uneven ground only after acres have been covered. That is why skid or wheel position, terrain changes, and the lowest obstacle in the pass should be part of the first-pass inspection. A machine can sound normal while the work behind it is changing. Walking the pass, digging where appropriate, and comparing several rows creates a more reliable picture than watching one convenient spot.
Plan to set height on level ground and inspect after entering rough terrain. The role of a crop residue shredder should be evaluated in that same sequence, with the tractor stopped and the equipment secured whenever inspection requires it. Do not fall into lowering the machine to chase a few missed stems. Aim instead for a consistent cut with fewer impacts. This approach also gives the next operator a clear starting point instead of a machine full of unexplained adjustments.
Residue goals affect setup
Capacity is useful only when the field result holds up. Here, fine sizing may speed breakdown while a coarser finish can preserve cover and reduce power demand. Track particle length, distribution, exposed soil, and the next field operation, then compare the result with the acres-per-hour number. This is the point where the equipment earns its place: it should help the operator hold an acceptable result through normal changes without constant guesswork. If quality falls away, reduce speed or change one setting before adding another variable.
The best test is to adjust one variable at a time and evaluate the full swath. Apply the same standard when evaluating a farm shredder rather than assuming its name guarantees a certain result. Be cautious about judging only the center behind the tractor. What matters is residue prepared for the job that follows. A documented comparison between two settings is more valuable than a long demonstration with no measurements and no agreed definition of success.
Maintenance shows up in cut quality
Ownership gets easier when the buying conversation includes the practical issue that missing or uneven knives create vibration and visible streaks long before the machine completely fails. Confirm knife pairs, fasteners, bearings, belt tension, shields, and rotor cleanliness and decide who will handle the first question during a narrow field window. The final equipment choice should make routine setup, inspection, and service understandable to the people who will actually use it. That practical fit is part of performance, not an extra.
Before committing, inspect on schedule with the machine secured and power isolated. Ask how the available configuration affects the same decision and what parts, tools, or training should be on hand. Avoid replacing one damaged knife without restoring balance; it can make a low purchase price expensive during the season. Look for smoother operation and a more uniform finish. A good purchase leaves the operator with a repeatable starting setup, a safe inspection routine, and a clear source of product-specific support.
Frequently Asked Questions
Can a flail machine handle small brush?
Some configurations can handle limited woody material, but capacity varies by knife type and machine. Check the manufacturer’s rating and remove hazards that exceed it.
How fast should I run flail mowers?
Use the speed that maintains rotor momentum and the desired cut. Thick, wet, or tangled material usually requires a slower pace. A clean second look at the swath is more useful than a speed target.
Why is the machine vibrating after hitting debris?
Stop safely and inspect before continuing. A bent or missing knife, wrapped material, loose hardware, or rotor damage can create imbalance. Follow the manual rather than running it to see whether the vibration clears.
.

.
Tired of Fighting Your Farm Equipment? Let’s Make It Easier.
Reach out to us online at Hiniker to fill out a form or call us at 507-625-6621.
We are here to assist you with all your farm equipment needs. We carry the latest equipment, whether it’s cultivators, cover crop seeders, rate controllers, shredders, windrowers, or a forage chopper.
Find your Hiniker Dealer today to find out more about our amazing agricultural equipment. You can also follow us on Facebook for the latest news and updates.